What Jewelry Should I Make To Sell At A Craft Fair?

One question new jewelry artists often ask when preparing to do their first show is, “What kind of 381825_10150397534614431_1074478830_njewelry should I make?”

Of course there is no be-all, end-all answer. All shows are different, and even the same show is different in different years.  However, I can offer a few tips on what has worked for me. Be sure to also see our article with tips on how to maximize your sales at an arts & craft fair.

1 – Know your audience

Audiences for shows can vary. For instance, I have one show that draws big spenders, and I know I will sell multiple sterling silver bracelets at this show.  For other shows I am certain that attendees are looking for items with lower price points, so while I might have a few sterling bracelets out, they take backstage to less expensive jewelry that I believe will sell better.

I highly recommend visiting a show before applying for it, or speaking with non-competing vendors who have done the show. This way, you’ll be able to get a feel for the types of people you’ll encounter in your booth and can tailor your inventory to meet their expectations. Do market research (formal, or informal) to find out what they buy, how they like to buy, and what sorts of marketing/branding appeals to their demographics.

2 – When in doubt, make more earrings

earringsEarrings are by far my best-seller at shows, and this is the case for 90% of the jewelers I talk with, at least those who do a traditional mix of bracelet/necklace/earrings. Of course, if you specialize in pendants or rings or something other than earrings, then it doesn’t make sense for you to make earrings just for the sake of making earrings. Don’t dilute your brand by trying to be something you’re not.

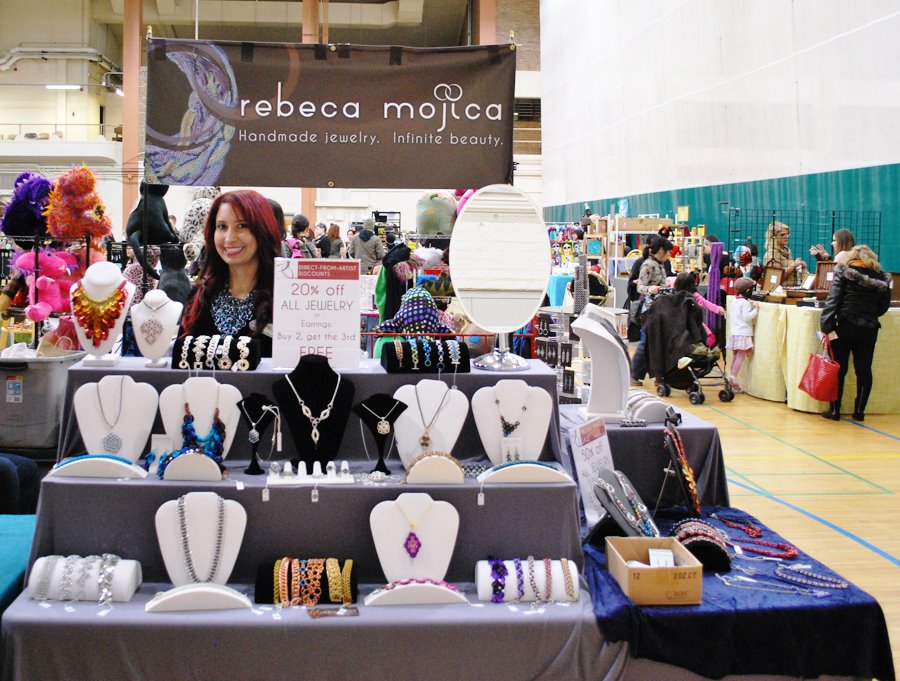
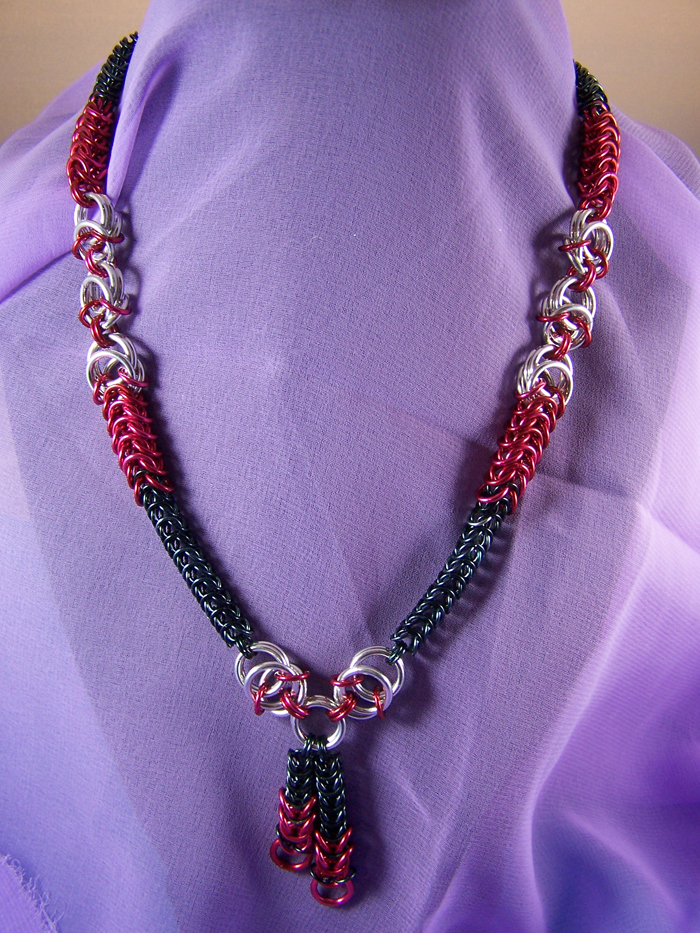
But if earrings are a normal part of your inventory, definitely make sure to have plenty on hand before a show. I’ve found that often when I display an intricate, expensive piece, people are drawn to it but cannot afford it. So I started creating earrings that mimic the motif of the expensive piece, and display the earrings next to this piece. This has led to increased sales for those earrings; it seems as though when people find art they really like and they can’t own the entire piece, they are OK purchasing a smaller piece because it allows them to support the artist and own just a bit of the design that captured their hearts.

While I display most of my earrings all together in a group, I also scatter a few earrings throughout my booth, next to necklaces and bracelets that are in the same collection.  Sometimes I have the same earring design on an earring tree as well as next to a necklace, and it is interesting to note that often the stand-alone earring sells three times over before the one on the earring tree sells. (Yes, for my best sellers I bring multiples in the same color scheme, so I can replace them as they sell.)

3 – If this is a holiday show, consider one or two holiday items. Or otherwise cater to your audience’s color themes.

holiday
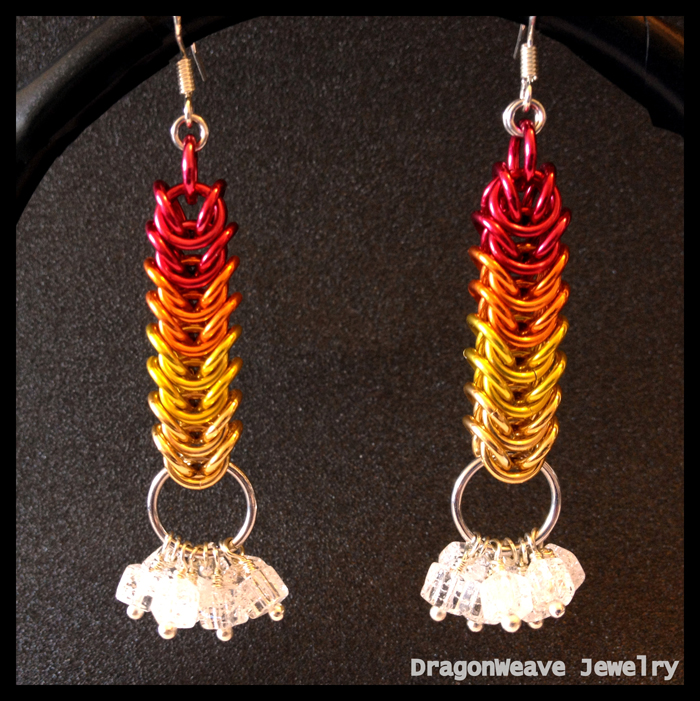
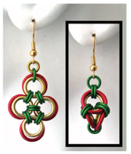
This doesn’t mean to get all kitchy and deviate from your brand. However, I’ve noticed that during the holiday season, there are certain shows in which women are specifically looking for holiday-themed earrings or jewelry because they have a holiday work party to attend. It is best if the jewelry is more “neutral” (for instance, think of a bracelet with alternating stripes of red and white, rather than a red and green wreath brooch) so they can possibly wear it beyond the holiday season. However, I’ve also had several women purchase red/green/gold earrings that screamed “holiday!”. The price point on the earrings was low enough ($18 and under) that they felt justified in spending the money for something they’d only wear a few weeks out of the year. If you can make ornaments, consider making a few even if only to decorate your booth with your art.

I once made a silver snowflake pendant on a whim, and then had a customer come by who was obsessed with snowflakes, and so she HAD to have that pendant! I’ve since made a few more, usually in alternating years (so my inventory doesn’t appear the same from year-to-year for my repeat customers) and have sold them at my winter shows.

And remember, I said there are certain shows in which people are looking for holiday items. Remember point #2 – know your audience. If they are going to be disgusted by holiday/religious/seasonal stuff, don’t put it out!

packers
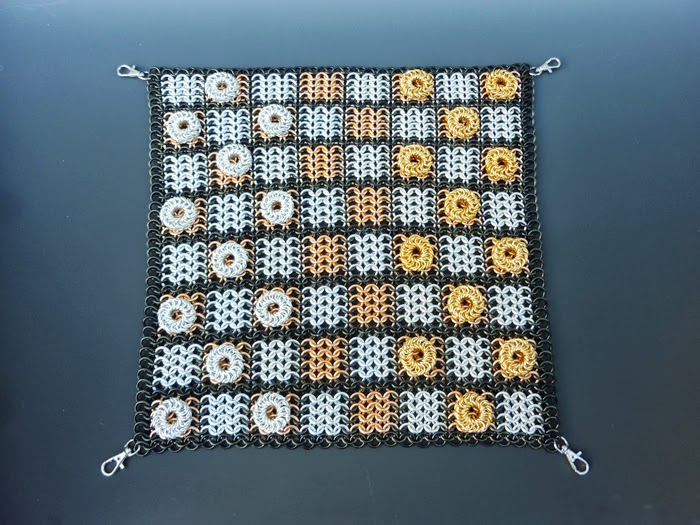
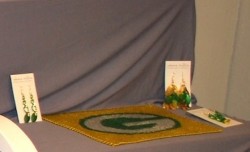
Even if it is not the holiday season, you may be able to provide items in colors that mean something to your customers. If there is a lot of support for your local school, university or professional sports teams, consider displaying a small sign with the school mascot, or some other visual representation of what your colors mean. Then place appropriately colored jewelry next to the display.  I often bring my Green Bay Packers inlay and display green and gold earrings next to it. (The photo at right was taken on the last day of a show, after I’d already sold 7 pairs of Packers earrings!) Packers fans see the inlay, get really excited, and often wind up purchasing multiple pairs of earrings for themselves and friends.  There are plenty of other non-sports teams color options too. You can create pride jewelry if you have a LBGTQ community. Or various colors for supporting medical conditions. And so on, and so on: the list is endless.


4 – If you are in a juried show, make sure you sell what you put on your application!

This seems obvious, but having worked as a show organizer, I’ve seen first-hand when someone applies for the show with one type of product (let’s say candles), and then shows up with completely different products (such as greeting cards).  This is in extremely bad form!

It doesn’t matter if you apply for the show 9 months ahead of time and have decided your creativity is sparked by something else closer to show date. You need to vend the items that were on your application, or similar work. If you don’t, you risk note being invited back. You will possibly even be asked to leave by the show organizers, especially if other vendors notice (and believe me, if they are selling the same items as you, and are right next to you, they will most certainly notice!) and complain.  This is Show Etiquette 101, but it still amazes me how many times I see vendors not complying.

What should you do if you feel your work has changed drastically since you applied for the show? Contact the show organizers, explain your situation and show them photos of your work. And then let them decide if they believe you should show your new work, but don’t be surprised if they request that you either dig up old items or request that you bow out.

5 – Bring additional components

If you bring jewelry, you will find it can increase your sales if you are able to customize pieces on the spot. This could mean swapping out one color pendant for another, selling a pendant without a chain, resizing a piece, or swapping earwires.

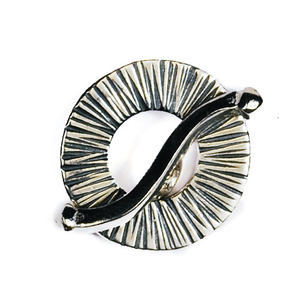
Since I make chainmaille, it is usually very easy for me to resize most pieces. I try to take extra “clasp” rings and popular size rings in case I need to make a bracelet slightly larger or smaller. I’ll also have extra clasps because some people love toggles and others don’t. This way, I can swap out the original clasp for something more to their liking. If it takes me only a few minutes, and guarantees a sale, it’s worth it to me! I don’t charge for these services, unless the length being added is greater than 1 inch, or if the cost of the new materials (particularly if sterling) is significant.

I also bring extra earwire in a variety of metals, including hypoallergenic niobium. I try to have 2-3 sets of clip-ons or screw-on earrings as well. For a while, they were in high demand, and then demand waned. However, at my last show I had 3 customers request clip-ons, so I am definitely going to be stocking a few for the next show. I usually charge a small fee to switch to clip-ons, because those components are far more expensive than the regular hook earwires I use. And of course, there is an additional fee for upgrading to silver or gold earwire. Customers completely understand the cost of the materials, and they never bat an eye when I tell them about the fee.


Have a great hint that I didn’t mention? Share it in the comments below! It’s great to learn what works in different parts of the country and the world :)

This article is part of Blue Buddha’s series: Behind the Scenes at a Craft Fair.

Vote to select June’s “Featured Weave” contest winner!

CAST YOUR VOTE NOW!

Submissions for June’s Featured Weave Contest are closed and we’ve narrowed down the submissions to a group of finalists – which means it’s time for YOU to cast your vote to determine the winner. Thanks to everyone who submitted a piece featuring Box chain. They really let this simple, yet versatile, weave shine. Happy weaving (and voting)!

To share the survey, we recommend you copy the link to this blog post and use that in any emails, blog posts, or social media posts you’d like to make about it (we’ve noticed some weirdness in the past with sharing the link directly – it sometimes likes to bump people out of voting who haven’t already).

Get a sneak peek at our finalists below:

BeadedBox-Bracelet BoxBib ColourFadeBracelet EndlessBoxCheckers GraduatedBoxNecklace IceandFire Izibella OutoftheBox Pink QueensHeart RippleBoxChain

FEATURED WEAVE FOR JULY – HALF PERSIAN

KIT-ZEELA-ALUM-300px
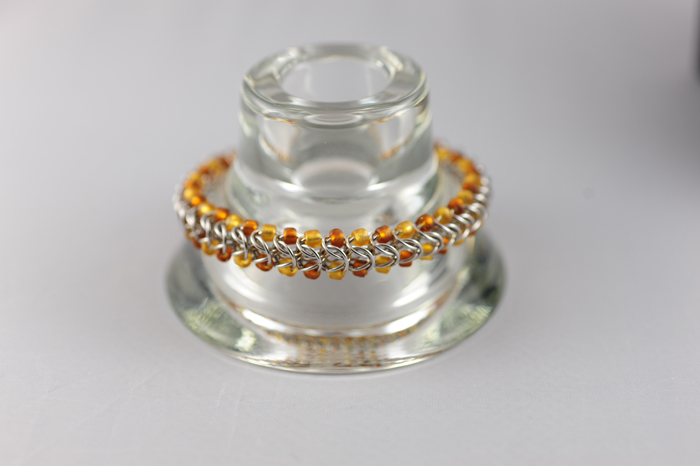
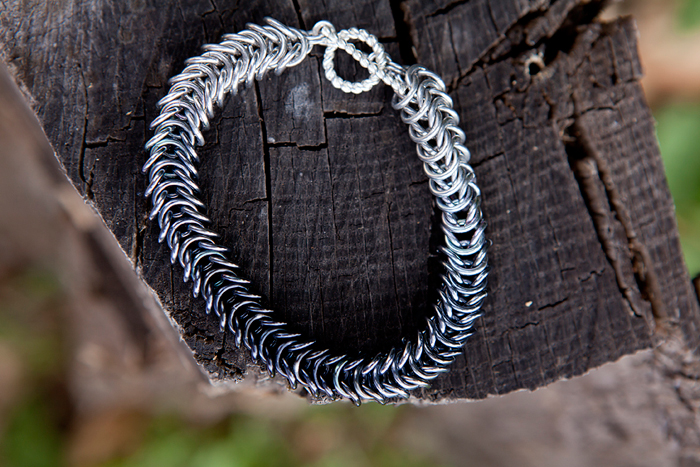
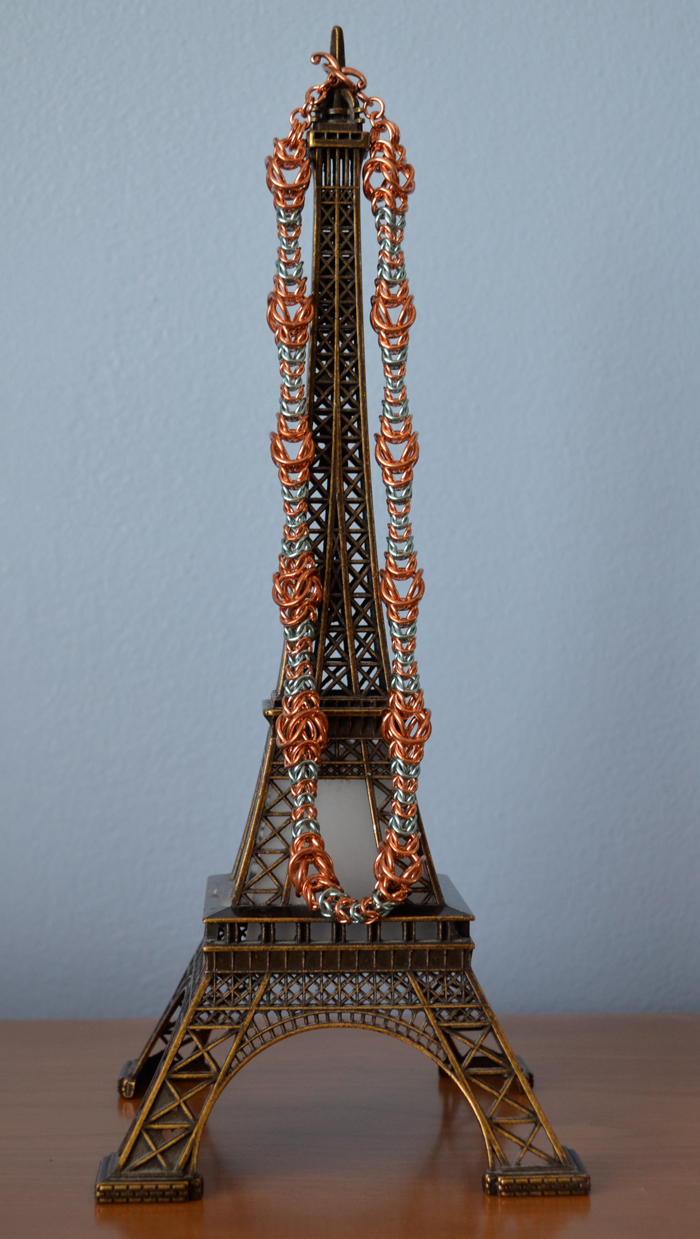
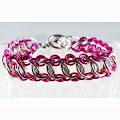
For July, we’re featuring Half Persian. This weave is commonly used to make men’s jewelry, but it has no problem embracing it’s feminine side! Sturdy, yet delicate and slinky – this weave has it all. Tackle this project using Half Persian 3-in-1 or Half Persian 4-in-1 (aka Flat Persian, Snake Chain). We can’t wait to see what you come up with!

Want to see which B3 sizes work well for this weave? Visit our base metal stats & uses page and our sterling silver stats & uses page.


Tips To Make Your Arts & Crafts Show Booth—Big Or Small—Look Great

Three Jewelry Artists Share What Works For Them

NOTE: This article is part of Blue Buddha’s series: Behind the Scenes at a Craft Fair. Check out the other articles for even more advice on how to rock your show!

So you’ve been accepted into a craft show – yay you! But now what? You want your booth to rock and show off all your hard work but maybe you’re not quite sure how to do that. How many tables should I get? Do I need curtains? What about displays? It’s enough to make your head spin.

The truth is, finding the perfect booth setup takes a good amount of trial and error and what works at one show might not work at another. That said, you can learn a lot by asking other artists and even making the rounds during a break – seeing what ideas you like (and might want to steal!) and noticing what doesn’t seem to work. Below, we asked 3 show veterans to share their tips for making their craft show booths rock. We hope this helps show newbies get an idea of what they need to get started.

Have questions? Leave them in the comments or shoot us an email at [email protected]. Happy Showing!


KAT WISNIEWSKI

Elemental Art Jewelry

Setting up your both….when you need to fill a 10′ x 10′ Booth (click photos for larger views)

Kat-display01 Kat-display02

TIPS FROM KAT:
To make my booth my own, I use curtains that match my logo colors and touch the ground all along the back wall. They are weighted own with zinc dowel rods to keep them straight and not flying around in the wind. I also have front curtains. These go a long way to creating a warm, inviting entrance – like having your own little shop window among the many vendors! I attach these curtains to the front poles of the tent so they don’t blow in the wind either.

For jewelry display, I use three 6ft tables and three 15″ x 15″ black display pedestals with varying heights. I have one 6′ x 2′ vinyl banner

In leatherette displays I have:
25 white & 25 black neckforms
8 white half moon bracelet displays
2 white t-bar and 2 black t-bar displays
6 black metal earring racks
2 acrylic/black earring spinners

Everything is arranged by color fade and not collection. I used to group it by collection but realized that I could sell a lot more by organizing it by color groups– which worked! I have a small section dedicated to sale items in the back of the booth. In the front on one side, I put one large mannequin with a hat, belt and large long necklaces. In the front on the opposite side, I lead with my Rubber Bloom collection. These are really bright and colorful rubber & enameled copper pendants, earrings & rings that have a low price point. I usually sell out of these at every show, so it seems to be working. I have around 150 pairs of earrings at each show as those always sell the best. I have more bracelets than pendants out usually.

Visit Elemental Art Jewelry’s page on Facebook, Twitter feed or website for more!


SARA RICHARDSON

Lovestruck Jewelry

Setting up your both….when you’ve only got a table. (click photo for larger view)

Sara-boothSince I usually only have room for one table at most of the shows I do, I find “building up” a good technique. I bought the silver wire rack in the middle from Target. It was the perfect size for my necklace displays…which tend to have the most “wow” factor, and draws a lot of attention. I can also hang earring cards from the rack’s edges to bring more attention to earrings, which are sometimes skimmed over. Since some of my displays are tall and can hide other items, I found this to be a great solution. It also allows me a little more flexibility to arrange my table and fit everything on it!

Visit Lovestruck Jewelry’s page on Facebook, Twitter feed or website for more!


DARLENE OSTROWSKI

Do Bats Eat Cats

Setting up your both….when your space is somewhere in the middle. (click photos for larger views)

darlene_booth acen2013

If I get an actual booth space (i.e., not just one table), I usually like to set up my tables in a “U” or “L” shape, to maximize the space I’ve been given. Sometimes, though, shoppers seem unwilling to step INTO a booth rather than just walking past it. So I always put something really eye-catching at the end of the “U” or “L,” right at the aisle where shoppers are walking by. You want it to be right in their face so it gets their attention, even if they’re just doing a quick scan! This is usually my Goth Tree, covered in ornaments, if I’m doing a holiday show. It’s tall, black, and silver and most people haven’t ever seen a black tree before so it gets noticed! I often put my gridwall of earrings right at the aisle too, because they’re a best-seller for me and there’s just something about a big cube covered in shiny, sparkly things that seems to make women stop and look.

I am unnaturally in love with this portable and collapsible gridwall for displaying earrings, which I’ve been using for about a year now at my shows. You can arrange it any way you want and get a great deal of height from it, without having to haul big displays. (I don’t have a car so compact displays that I can carry onto public transportation is key!) I clip my earring cards to the grid. Best of all — it has proven to be windproof during outdoor shows, especially if I C-clamp it to my table. No more flying earrings when it gets stormy! You can get it at Target or other stores that sell home organization stuff.

You’ll see as the show progresses how people are moving through your booth and what they are noticing and buying (or not). Be flexible with your display — what worked at one show might not work as well at another (you can see how my both layout is different in each picture above), and it’s totally OK to rearrange or move things in the middle of a show. If you’ve got a normally popular item that isn’t selling, try moving it to another part of the booth — closer to the aisle, farther away, near a different item. People might not be seeing it, for whatever reason.

Visit Do Bats Eat Cats’ page on Facebook, Twitter feed or website for more!


Have a great hint that we didn’t mention? Share it in the comments below! It’s great to learn what works in different parts of the country and the world :)

This article is part of Blue Buddha’s series: Behind the Scenes at a Craft Fair.

5 Ways To Stay Healthy At A Long Arts & Crafts Show

Keep Your Body Refreshed While Working Long Hours

My longest craft show of the year is the One of a Kind Show & Sale Chicago each December. The show is open to the public for three 9-hour days followed by a 7-hour day.  This doesn’t include prep time and close-down time. And there is definitely prep that needs to happen for jewelers each morning; it’s amazing how dusty the displays get by Day 2!

In 2011, by the end of the show, I had shooting pains up and down my neck and felt really dehydrated and weak.  I vowed to make 2012 better, and am happy to report that I succeeded!  I’d like to share some of what worked for me, in case any of these tidbits will help you have a more enjoyable show experience.

1 – Wear comfortable shoes (with insoles), or remove your shoes altogether.

comfy socks to wear in a show booth

When prepping for the show, I told my assistant April to make sure to wear comfortable shoes.  “Actually,” April said, “If it’s cool with you, I might leave my shoes off from time to time. I’m often more comfortable without shoes, than with them” Not only was it cool with me, I thought it was pretty brilliant!

I too prefer going shoe-less. As soon as I get home, I cannot wait to take off my shoes! I usually don’t wear uncomfortable or restrictive shoes … but my life is just so much better sans shoe!

So taking a cue from April, I decided to bring a pair of cushy socks that I could don during most of the show. I knew I could always put my sneakers back on if my feet started to hurt. I am happy to report that my feet and calves have never felt better during a show!  Yay! I loved that I could occasionally stand on my tippee-toes or point my feet to fully stretch them out.

Admittedly this won’t work so well if you are at an outdoor show, especially if it is a muddy one. However, that might be the perfect setting to use Barefoot Shoes – which I may even try myself at my next indoor show. Or, add some cushioning in the form of a foot pad inside your shoe (this can also work well at shows that have concrete floors).


2 – Do a restorative post with your feet up for 10-15 minutes each Lying on floor with legs at 90 degrees to refresh and rejuvenatenight

A massage therapist recommended that each night when I got home, I should do a “grounding pose”.  Specifically, she suggested the 90/90 Rest position (see more below). Admittedly, this can be difficult to commit to, especially if you just want to go to bed.  However, on the first night, I found that just 10 minutes in this position made it easier for me to later get into a comfy position in my bed and fall asleep.  So it was easier to do on subsequent evenings, because I knew I would feel the benefit almost immediately.

Static Back or the 90/90 Rest position:
This pose is billed as the world’s easiest postural restoration exercise. It goes by many names, including 90-90 position, constructive rest, static back, and others. This position puts the low back in the position of least load on the discs and the joints.

  1. 1. Lie on ground
  2. 2.Put feet up (on an ottoman, chair, coffee table, significant other, etc.)
  3. 3. Make sure your hips and knees are at 90-degree angles
  4. 4, Relax your arms out to the side at a comfortable distance from the body and roll the palms up.
  5. 5. In this position breathe into your abdomen allowing the belly to rise when you inhale.  Breathe out slowly  and feel your lower back relax  into the ground.  If your head is tipping back, place a hand towel under the back of your head in order to give it support and a neutral position.
  6. 6. Continue breathing, enjoying the moment, and relaxing.

Aim for 15-20 minutes per session, or at the very least 10 minutes. (10 minutes is better than zero minutes!) I also use this time for meditation. I sometimes listen to soothing music and try to focus on my breathing, or I do one of my the guided meditations that I’ve bookmarked, particularly ones to encourage sound sleeping. (You’d think I’d sleep well on show days, but sometimes I am so wired and plagued with thoughts of everything I want to do during set-up the next day, that it is difficult to sleep. Mediating helps tremendously.)

In addition to the grounding pose each evening, I wanted to get in some stretching throughout the day. My goal was to do some at the start of each day, midday, and right after teardown.  Unfortunately, I never remembered. So for next year, I am going to make a little sign for myself, or set a reminder on my phone. Even just 2 minutes of stretching is better than no stretching at all!  And who knows, maybe I can connect with other vendors who do yoga, and we can do a sun salutation in the morning. It always helps me stay motivated when there are others doing this with me.

3 -Prep lots of healthy food to eat/juice for dinner
veggies/fruit ahead of time for juicing

freshly made juice

OK, the glass is impractical for a show. But the juice is delicious — freshly juiced beets, beet greens, carrots, oranges and ginger. I don’t even like beets, but they taste just fine when mixed with oranges and ginger!

Most show venues aren’t known for healthy food. I’ve been bringing my own food to venues forever because I am a picky eater, and I also stick to mostly an anti-inflammatory diet. Granola bars are a staple for me at shows, but I also bring a few other items when I can. I also try to bring ample amounts of protein, as that keeps me sated far longer than carbs do.

Some of my favorites:

  • in a small tupperware: 1/2 C oats with dried cherries/raisins + a 1/2 cut-up apple. Add water and stir (or shake) just before serving. (Sure, the apple usually doesn’t look awesome by the time I eat it, but it keeps fairly well and tastes fine for several hours). Don’t forget a spoon!
  • nuts: almonds, pecans, walnuts, etc. You may wish to measure out serving sizes in small baggies, or put them in a pill/vitamin storage device. It is easy (for me at least) to eat much more than a serving if I am not paying attention.
  • veggies & hummus (The hummus will remain edible for a few hours without refrigeration.  If you put baby carrots in the freezer the night before, and take them out when going to the show, they’ll be thawed, but still slightly chilly a few hours into your show.
  • healthy crackers
  • Fresh veggie/fruit juice! Sadly fresh juice begins to lose nutrients almost immediately, but it’s still better than soda!  If you can make or bring juice, I highly recommend it.
  • LOTS of water!!!

When I attend shows away from home, I try to stay in a hotel that offers refrigerators. (Some hotels require that you ask for one in your room, and some charge an additional fee.) I look for the closest grocery store–sometimes that means Target!–and stock up on a few items, including things to make my own salad.

Insulated cooler bags help keep refrigerated items cool. I don’t use them because I like things room temperature, but if you want to make sure your stuff stays cold, try bringing your food in an insulated bag.

4 -Do not slip into the “just one more customer, then I’ll eat” trap

I cannot stress the importance of this enough. Each year, I have to plan my breaks in ahead of time, because if I don’t, I will never leave the booth and will always find an excuse to talk to customers instead of taking care of my needs.  I should know by now, that if I don’t eat when I should, I’ll get a headache, yet somehow, it is too easy to keep postponing so that I’ll be here “when the next big sale happens” or “just in case someone needs me.”

So yes, I have to schedule in breaks, and even if I can’t leave right then and there because I am in the middle of helping someone, I at least know I’ll be able to leave right afterward. I arrange for a helper to take over during my lunch break, so that I can eat away from the booth, which not only gives me a few minutes of R&R, but also means that customers don’t see me stuffing my face. :-)

If you do not have a helper, then it is even more important to make sure you have lots of bite-size snacks that you can graze on throughout the day.


 5 – have a massage all ready to go the day after the show!

Rebeca is a regular client of Janna of To the Point Myotherapy (pictured) for trigger point work. http://tothepointmyotherapy.com/

I am a regular client of Janna Lombardo (pictured), founder of To the Point Myotherapy for trigger point work. http://tothepointmyotherapy.com/

Yes, you’ve earned it!

When I had the shooting pains up and down my neck, I knew that couldn’t be good for me, and so I called to schedule a massage appointment. They were already booked, so I couldn’t get in for a couple of days. Lesson learned. Now, I book the massage in advance, so I know it is waiting for me at the end of the show.

Some people consider massages to be luxuries, but for me–someone who works with my hands and puts certain parts of my body through a lot of stress–they are a necessity. Various studies have also shown massages to be helpful in improving a wide variety of medical conditions.

It is unfortunate that massages aren’t yet considered valid preventative medicine and therefore aren’t covered by insurance. However, I look at it as an investment: by taking care of my body in as many ways as I can know, perhaps I will be healthier as I age and require fewer treatments then, thereby saving money in the long-term.

Additionally, I rarely take time out to pamper myself, so this is a nice moment for me to acknowledge my body for all I’ve put it through and to thank it for serving me so well all these decades.


Have a great hint that I didn’t mention? Share it in the comments below! It’s great to learn what works in different parts of the country and the world :)

This article is part of Blue Buddha’s series: Behind the Scenes at a Craft Fair.

5 Ways To Boost Sales At An Arts & Crafts Show

Show season is here and many of Blue Buddha’s customers are busily working on replenishing their inventory, pricing and tagging jewelry, and planning their booth layouts for the summer show season.

I’ve done craft shows for nearly a decade, and each time I do a show, I learn something. Over the years, sales have increased significantly at my booth. While some of this is due to repeat customers (gotta love the die-hard fans—they are so amazing and sweet!), additional increases are due to some of the tweaks to my booth. What a long way I’ve come from my very first show, when I didn’t accept credit cards, nor did I even have a table covering!

I’d like to share some of these tips with you. This article is the first of our 5-part series – Behind the Scenes at a Craft Fair.

5 Things To Do To Increase Your Sales at a Craft Fair

1 – Have a show piece, but don’t put the uber-expensive show piece up and center

micromaille by Rebeca MojicaHaving a show piece is great. By this I mean, your most extraordinary piece of work, the piece that is so utterly amazing it causes people to stop in their tracks and say, “wow!” Such a piece shows off your skill, and let’s face it, everyone likes a winner!

Potential customers want to purchase a piece of your creativity: even if they cannot afford the show piece, they can afford a similar smaller and less intricate piece, and they still feel as though they are getting a piece of your talent for themselves.

However, I learned that putting my show piece, Posiedon’s Embrace (shown at left) up and front ALWAYS invited the question “How much is it?” and once people found out the price, they would move their hand away as though they’d touched a hot stove and back away without even bothering to see the $10-$30 earrings right next to it. They just assumed that because this one piece (which took me 100+ hours to make) was in the thousands of dollars, everything else must also be out of their reach.  Not so! Everyone always gravitated toward that piece, which costs about 80 times the average item price.

Blue and purple anodized aluminum chainmaille scarf

Replacing the expensive haute couture necklace at left with a more accessible chainmaille scarf caused people to explore my booth instead of immediately stepping back, fearing they couldn’t afford anything.

So for my last couple of shows, I decided to position a different piece front and center. I put out one of my scarves, which retail between $350-$850. While these items are not inexpensive, they are still reasonable enough to people that they can expect that bracelets and earrings will be in their price range.

It worked! People no longer walked away immediately after hearing the price of this one item. I still kept Poseiden’s Embrace in the booth, but put him further back, so customers had to walk past nearly all of my other inventory before they encountered it. By the time they got there, they’d seen dozens of pieces from $10 – $300, so they know that this piece was special and extraordinary.


2 – Put up tiny signs listing the materials used

For a few years I had small acrylic signs, in which I printed up some information about the metals I use, and positioned the signs near the appropriate metals.  Problem was, I only saw a few folks reading them, and LOTS of folks asking “what metal is this?”  So I knew my system wasn’t working.

handmade stainless steel rings and brass braceletsSo for my last show season, I put out tiny signs that, in very clear lettering, displayed the metals of the surrounding pieces.  I had several such mini-signs throughout the booth. And frankly, I don’t know why I delayed so long in doing this! I could see people coming up to the booth and starting to ask, “Is that copper?” and then seeing the sign.  Yay!

And also, it was great that I didn’t have to explain 600 times, “No, the piece that looks like rose gold is actually bronze” and “No, that is not sterling silver, that is aluminum.” They could see  the answer themselves, and I think they felt empowered getting that information without having to ask.

No matter what medium you work in, there are likely lots of “frequently asked questions” you get from customers. Or your customers might not ask some questions because they don’t even know what to ask!  By displaying answers, or pointing out things they otherwise wouldn’t know, you are giving them valuable information they can use in the purchasing decision, and they can get this information even if you are currently busy helping another patron.


3 – If you have lots of smaller items (like earrings), price everything clearly

From the get-go I have always priced all of my work (except the show pieces), and I find this greatly minimizes me needing to spend time looking up prices or trying to memorize prices for the 100+ pieces in my booth. I’ve read that people are more likely to make a purchase when they can see the price.  And it makes sense – if you’re busy helping someone, a potential customer could walk away if they do not see the price and do not want to wait around and ask. Even if you’re not busy, some people just don’t want to ask questions anyway!

Try to keep your price tags neat as well as discrete, so your booth doesn’t look like little pieces of paper exploded all over everything (unless your logo is the coolest thing in the world). You may need to tidy up your price tags several times during the day.

Also, it goes without saying, but be sure your prices are very clearly marked, and are bigger than you think they need to be.  It may be uncomfortable for someone to ask for your help in deciphering a price that they can’t read, and you could lose sales.


4 – Have funky hair. Or a totally awesome neck piece. Or just something that is going to get people to notice you in a positive way!

anodized aluminum chainmaille necklace by rebeca mojicaThis may seem like a very weird tip, but it seems to be true. For most shows, I’ll wear one of my chainmaille scarves, or a dramatic necklace and people nearly always comment.

For a few years, I had deep red hair, and folks would often compliment my hair. That is, they used to comment on my hair until I had a helper with vivid purple hair! I was amazed at the number of people who came up and commented “cool hair” or otherwise started a conversation with her.

Literally, at least 6 people per hour would come up to us and say, “Wow, great hair!”  So that is about a person every 10 minutes, coming up to the booth and complimenting us.  Of course there are other people coming up to the booth, most of whom are commenting on the jewelry … but still, any way you can get people to come up and say something to YOU rather than you initiating the conversation, works toward your advantage. I think this is especially true if they are talking about something creative or artistic, which dyed hair is.

I’m not telling you to go out and dye your hair purple. Being artists, we can get away with more creative appearances, but you still want to make sure that if you’re doing something more dramatic, that it fits with your brand, and your own personality. (If you’re trying to do something that isn’t natural for you, people will pick up on that and will possibly on a subconscious level, find you less trustworthy.)

You also want to be sure that you won’t ostracize your most conservative customers.  I often put myself into the shoes of my various customers and do my best to choose a conversation starter that will communicate to people that are more like me, “Hey, I’m like you!” but not make me unrelatable to more conservative clientele.  I’ve actually found that, by walking this line, some of my more conservative clients live vicariously through my fashion statements.  Maybe it’s something they wouldn’t do or wear themselves, but they still like it and by purchasing my work, they are buying into that personae in their own way.  When they wear their Rebeca Mojica jewelry, they are putting on that purple hair or wild necklace in their own way and that’s pretty cool!


5 – Ask an open ended question to everyone who walks by.

A good rule of thumb is to smile and say hello to everyone who walks by.  But I’ve found it is even better to take it one step further and get ask them a question that will make them engage with you.  I sometimes say, “Have you seen chainmaille before?” “Do you know chainmaille, or are you just drawn to pretty shiny things?” etc.

Some sales people say it is a good idea to ask them a few questions that they will say “yes” to, because if you get them saying “yes” once, then they are more inclined to buy something. (A good “yes” question can be as simple as, “So, are you enjoying everything you’re seeing here?” Because if you are at a good show, the answer to that will be “yes” a really high percentage of the time.)

Either way, though, customers likely have faced dozens of vendors who either didn’t great them, or who just greeted them by saying “hello.” Find something memorable to say to them: engage them, get them smiling and be unforgettable in the most positive way!


And finally, one bonus tip!  I forgot to do it this year, but I’ll do it next year for sure:

6.  If you have additional inventory, put up signs indicating so

I gladly create custom work, and I also have more colors available for most pieces in my booth. Yet customers don’t know this unless I tell them. I had thought this was fine – I figured it gave me a chance to interact with customers to let them know that they could purchase this necklace in red, or that bracelet in blue.

It is clear that customers don’t automatically assume that there is more inventory available.  They often think that what is out, is it (and this is certainly the case at some booths, especially those that specialize in one-of-a-kind designs). Whenever I told someone I had additional colors and sizes, they were like, “Oh, wow, that’s great!” and about a third of the time, asked to see a particular piece in a different color.

Though I did get a few sales from doing so, I feel as though I lost more sales because of the times when both my helper and I were busy with customers, so we couldn’t shout out, “More colors available!” to the folks who were browsing.  So next year, I’ll put out a couple of signs next to my most popular pieces, and will see how it goes!


Have a great hint that I didn’t mention? Share it in the comments below! It’s great to learn what works in different parts of the country and the world :)

This article is part of Blue Buddha’s series: Behind the Scenes at a Craft Fair.