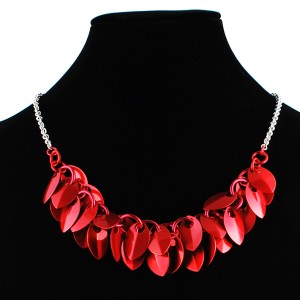
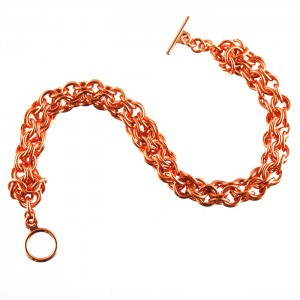
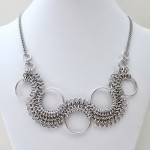
Get in the mood for fall with October’s “Maillers’ Choice” kit!

Below you can vote for the kit we will release in October.


Love Maillers’ Choice? Join the club! Subscribe and you’ll automatically receive every Maillers’ Choice kit in your mailbox each month.

subscribe-MC


shaggy-scales-1row-REDFor October, we’re getting in the mood for fall with this shaggy scales necklace.  Click the button below to help us create an original fall leaves mix.  We can almost hear the crunch under our feet already :)


The Winner of August’s Featured Weave Contest Is …

Voting for August’s Featured Weave Contest is now closed, and the (adorable) winner chosen by you is:

Jessica G. with Sir Teddy Bear!

SirTeddyBear

Congratulations, Jessica! You’ve won a $25 B3 gift certificate. Email us at [email protected] to claim your prize.


FEATURED WEAVE FOR SEPTEMBER – Roundmaille

OpenRound-700pxFor September, we’re featuring Roundmaille (including but not limited to Open Round, Turkish Round, Roundmaille, Captive Inverted Round, etc.) These weaves are super versatile, so we can’t wait to see what you come up with! Roundmaille is just that – but more tube or rope-like, and with an endless number of variations, it can be made anywhere from dainty to chunky.

For some roundmaille tutorials, check out Open Round, Turkish Round/Roundmaille, and Jacob’s DNA Ladder (CIR).

Want to see which B3 sizes work well for this weave? Visit our base metal stats & uses page and our sterling silver stats & uses page.

Happy Weaving!


DIY Fashion: Chain Draped Shoes

DIY-Chainmaille-Shoe-Chains


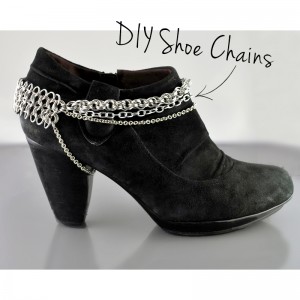
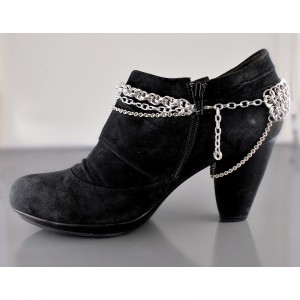
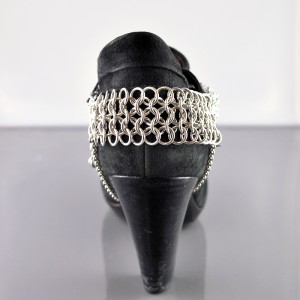
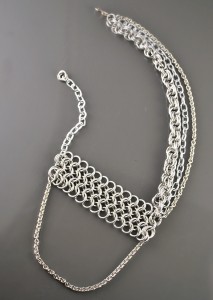
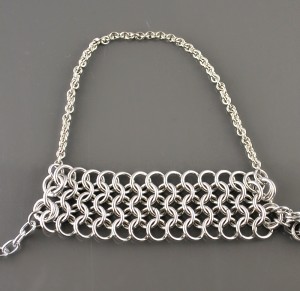
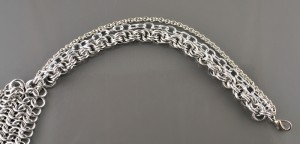
Chainmaille is popping up in fashion all over the place from high fashion runways to embellishments on t-shirts and even shoes.  We decided to take on one of these trends and create our own draping chains for shoes using a couple of our beginning level tutorials (one of which is even FREE) and some pre-made chain. We were pretty pleased with the results!  Here are our tips for creating your own.


DIY Draping Chains for Shoes

Shoe-Chains-Side Shoe-Chains-Back Shoe-Chains-Flat
    • Use a pair of shoes you think you might want to wear the chains with as your “mannequin”.  You want your final piece to compliment your shoes, so this is the best way to keep checking your work to see if you like how it’s coming along.
    • Stability for the piece comes from the heel section and the top-most draped chain.  Make sure the top chain and the heel section create a snug fit around your shoe/ankle to prevent the piece from sliding off the back of your heel as you walk.


Shoe-Chains-Heel-Closeup


    • Use sturdy jump rings for the these main sections.  We used 16 and 18 gauge rings so that they won’t start to pull apart as you wear them.
    • Put your shoe on to fit the draping.  We noticed that the draping fit considerably differently when we actually put the shoe on as opposed to just using it as a mannequin on our work bench.  Before you cut your chains, put the shoe on and get them to lay the way you want.


Shoe-Chains-Drape-Closeup


    • Order matters.  When connecting your draping chains to the heel section and the clasp ring, make sure they are in the same order (top, middle, bottom) or your piece will twist and not drape properly.

Shoe-Chains-Side

  • Make the closure adjustable.  You may need the fit to be tighter or looser depending on the shoes you want to wear your chains with.  We left a little extra chain to make the piece adjustable so it can be more versatile.
  • Have fun!  We’re pretty sure there are about a million different ways you could make these (we already have ideas for creating a pair using Half Persian 3-in-1 chains in varying sizes. Using rubber o-rings would also be really cool. :))


Take on this project?  Take a picture and post it using the hashtag #B3DIYFashion so we can see your handiwork!


What we used…


Heel Section:
Mesh & Rosettes Tutorial
–L16 Aluminum jump rings (136 rings total for both shoes)
Pre-made chain* for under the sole
We also “möbiused” the end rings to add stability – learn how to mobius jump rings with our FREE download.

Draping Section:
Double Spiral Tutorial (FREE PDF download)
–L18 Aluminum jump rings (224 rings total for both shoes)
Pre-made chain* in two weights (visit your local craft store to find chain you like!)

Closure:
–Möbius Ball to finish the end (FREE PDF download)
–H18 Aluminum jump rings (6 rings total for both shoes)
–Pre-made chain (visit your local craft store to find chain you like!)
Lobster Claw

Putting it together:
The rings you need to assemble your pieces together will depend largely on the size of rings and weaves you use. For our piece, we primarily used size H18 to connect the heel section, draping chains and closure (we used a total of 14 size H18 connecting rings for both shoes.)

*If you are using any very small chain (like the kind we used in the draping and for under the sole), you’ll need a handful of small 20ga rings (we used size D20) to connect the chain. We recommend using stainless steel to prevent it from pulling apart too easily.

TL-PLR-WBMD-100pxTools:
Due to the variety of ring sizes/gauges needed to complete this project, we found ourselves flipping between a couple different pairs of pliers. We used medium flat-nosed Wubbers along with our Euro Tool Ultra Ergos to make this piece come together. You’ll also need a pair of wire snips for the chain.


Vote to Select the August 2013 Featured Weave Contest Winner!

CAST YOUR VOTE NOW!

Submissions for August’s Featured Weave Contest are closed and we’ve narrowed down the submissions to a group of finalists – which means it’s time for YOU to cast your vote to determine the winner. Thanks to everyone who submitted a piece featuring European 4-in-1/Mesh. There were fabulous submissions!

If you share this survey, we recommend copying the link to this blog post and pasting that in any emails, blog posts, or social media pages. (We’ve noticed some weirdness in the past with sharing the link directly. It sometimes likes to bump people out of voting who haven’t already. Thanks!)

Get a sneak peek at our finalists below:

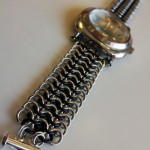
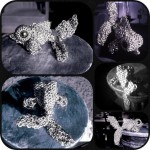
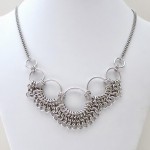
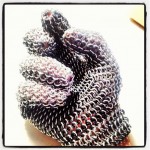
SirTeddyBear SerpentineEuro4in1  Intertwined HarlequinSonja Grapewinebottlecharms ChryslerTies Drinkcozy DualStripeWatch FancyGoldfish MeshfringenecklaceFlexMailleFittedglove


FEATURED WEAVE FOR SEPTEMBER – Roundmaille

OpenRound-700pxFor September, we’re featuring Roundmaille (including but not limited to Open Round, Turkish Round, Roundmaille, Captive Inverted Round, etc.) These weaves are super versatile, so we can’t wait to see what you come up with! Roundmaille is just that – but more tube or rope-like, and with an endless number of variations, it can be made anywhere from dainty to chunky.

For some roundmaille tutorials, check out Open Round, Turkish Round/Roundmaille, and Jacob’s DNA Ladder (CIR).

Want to see which B3 sizes work well for this weave? Visit our base metal stats & uses page and our sterling silver stats & uses page.

Happy Weaving!


Free & Easy Jewelry Project: Coiled Rubber Scallop Necklace and Earrings

It’s no secret we geek out on super-intricate “Whoa, how did you make that?!” chainmaille projects around here, but sometimes you just want to have a little fun and create something quickly you can wear out that night.  Thus our Free & Easy Jewelry Projects“.

We’ll be sharing project ideas that are quick (take less than 2 hours to create), simple (perfect for beginners) and utilize our FREE introductory tutorials or just simply tips included in the blog post to come together.  Just the kind of easy-peasy crafting you need every now and again, right??


Coiled Rubber Scallop Necklace and Earrings

If you love the look of coiled projects but can’t muster the patience to close all those little rings, using our rubber o-rings is a great alternative because, well, they come pre-closed! This idea would also be beautiful using glass rings (also pre-closed) or our anodized aluminum fades (not pre-closed) to create an trendy ombre effect.
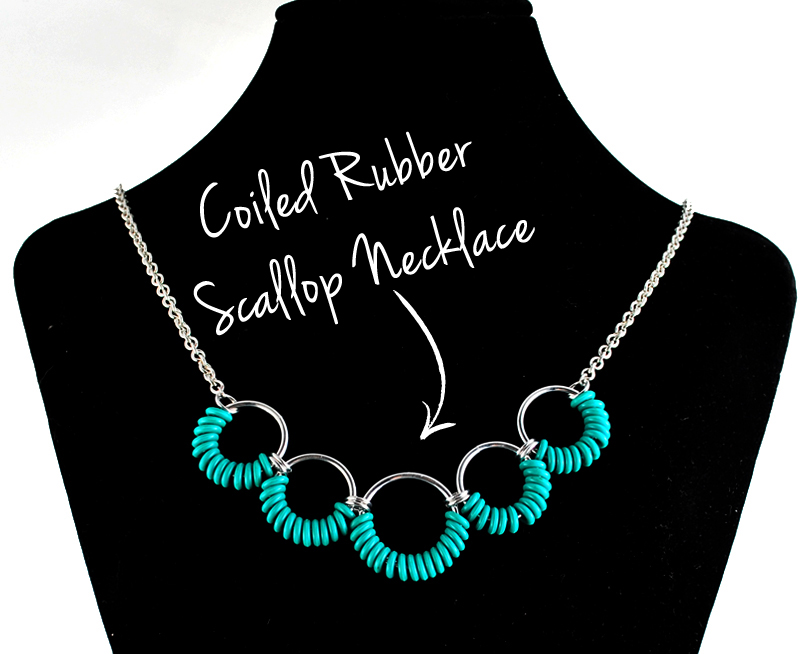
CoiledRUBR-necklace-arrow

MATERIALS FOR NECKLACE

1 x extra-large jump ring (we used size SS14 in aluminum)
4 x large jump rings (we used size KK14 in aluminum)
69 x small rubber o-rings (we used size D14 in green)
10 x medium jump rings (we used size H18)
12″-18″ premade chain (depending on how long you want your necklace to be)

(see bottom of blog post for ring size conversions)

Note: We also used 2 super tiny B20 rings to connect the chain to the end rings of our centerpiece. If your premade chain links are wide enough to accommodate your final rings, you can skip these.

There’s really no wrong way to make this necklace! Simple scoop open the large and extra-large rings and scoop the rubber rings onto them. We did 13 rubber rings on the large rings and 17 on the extra-large but have fun playing to see what you like best.

After closing these rings, connect them together using the medium jump rings. We used 2 in between each, but you could use 1 if you prefer that look.

To attache the chain, we added one medium ring to either end of the centerpiece and then added the chain using the tiny rings. Again, if you’re using chunkier chain than we did, it’s likely you can skip those little guys and just add the chain right to the final rings. Add your favorite finding to close off the back and you’re done!

*Poof* you have a necklace! Pretty rockin’, right?


We also created some matching earrings because, why not? The method for creating these is pretty much the same as the necklace, just make sure to add the connector rings in the center of your coiled rings instead of the ends. You can have fun playing with different ring sizes to create different silhouettes.

Here’s what we used:
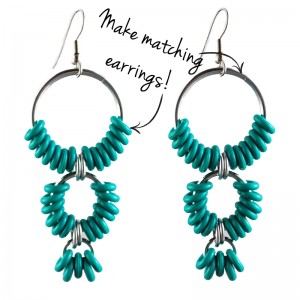
CoiledRUBR-earrings-arrows

MATERIALS FOR EARRINGS

2 x extra-large jump rings (we used size SS14 in aluminum)
2 x large jump rings (we used size Z16 in aluminum)
2 x medium jump rings (we used size L18 in aluminum)
4 x small jump rings (we used size H18 in aluminum)
31 x small rubber o-rings (we used size D14 in green)
2 x stainless steel earwire


Ring size conversions:

These are the exact ring sizes we used to make the necklace and earrings. The patterns allow great flexibility for modification, so you can change up some of the sizes if you can’t find them exactly. (The most important thing is to make sure whatever rings you use in place of H18 rings are still the proper size to fit around the extra-large/large (SS14/KK14) without being too tight nor too loose.)

SS14 – 14 SWG (2.0 mm) 3/4″ (19.0 mm)
KK14 – 14 SWG (2.0 mm) 5/8″ (15.9 mm)
Z16 – 16 SWG (1.6 mm) 15/32″ (11.9 mm)
L18 – 18 SWG (1.2 mm) 1/4″ (6.4 mm)
H18 – 18 SWG (1.2 mm) 3/16″ (4.8 mm)
D14 – 14 SWG (2.0 mm) 1/8″ (3.2 mm)
B20 – 20 AWG 3/32″ (2.4 mm)