Guest Instructor Joshua Diliberto to Teach Chainmaille Bag Class at B3!

Part of what we love about chainmaille — beyond actually weaving, of course — is getting to know and learn from other fun, creative and talented maillers. With this in mind, we are especially excited to announce that guest instructor Joshua Diliberto will soon be teaching a class at Blue Buddha Boutique!

joshuadilibertoJoshua will be on hand Saturday, May 3, to explain how to weave a chainamille bag – the first step when learning how to weave chainmaille clothing. Actually weaving will be just the surface of this class – he’ll also discuss the “flat expanding round” pattern, an essential technique to know if you’re looking to make projects such as coifs, cozies, bikini tops, shirts and other projects.
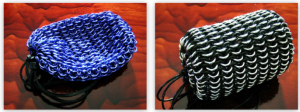
Joshua said, “It is a real honor for me to have an opportunity to teach [at B3]. It would be like an academic being offered a chance to speak at Harvard.” (Wow! Are we blushing yet?)chainmaillebags

Joshua has been making chainmaille for nearly 20 years and considers himself lucky to weave for a living. His specialty is creating new chainmaille weaves and applications; to date, he has 56 original weaves documented in the Maille Artisans International League (MAIL) database. 

We spoke with him about his creative process and how he develops new weaves. Joshua said, “Creating a new weave can come from many different places, and it often comes from a place inside that is never expected. Sometimes a new weave can come from a mistake. Sometimes it comes from playing around or experimenting. Sometimes a new weave is born from problem solving – maybe a bracelet needs to bend in a different direction and a new connection is explored. Coming up with a new weave is like publishing a scientific article or a piece of poetry. Chainmaille can be a beautifully rich artistic expression and it can also be a deep field of theory and research. Chainmaille weaves are my love.”

Developing a new weave isn’t the only challenging part. Before it can be registered, an artist must exercise due diligence and check to see if the weave they’ve created already exists! With more than 1300 weaves in the MAIL database, this is an arduous task, but a necessary one. Joshua advises artists, “The good news is that it looks like there are an infinite number of weaves to be made, so don’t be discouraged. It’s always important to make sure a new weave is useful or practical in some way. I’ve probably thrown away more new weaves than I’ve published because they aren’t pretty to me or have no use. If a new weave is just a jumble of rings that don’t interact well together, I will usually toss the weave in my mistake pile.”

Wait – a mistake pile? Yes. Joshua continued with, “My number one piece of advice to chainmaillers is to keep all of your mistakes. Do not take apart mistakes or throw them away because we are destined to repeat our mistakes. To me, a mistake is a temporary sacrifice that results in a future gain in experience and knowledge. Creations wouldn’t be so interesting if they always came out the way we expect.”

He summarized his process for coming up with new weaves as this: “I’ll try to make 20 new weaves. Out of those, 10 of them will be possible, and out of those, five of them will be useful. And out of those, one of them will be beautiful.” 

Seats are filling quickly, so don’t delay. Register now for Joshua’s class at B3 in Chicago on May 3.

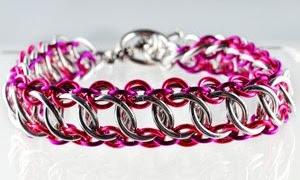
Chainmaille Tips and Tricks Videos: How to Open, Close and Hold Jump Rings

We have a pretty extensive FAQ section on our website, but sometimes words can only go so far when you’re dealing with something as tactile as chainmaille. This is why it makes us extremely happy that our new YouTube channel is up and running! We are glad to finally be able to address many commonly asked questions about chainmaille, and provide some tips, tricks and helpful techniques in a great medium.

Take a few minutes to check out these quick videos about opening, closing, and scooping jump rings off a bead mat. Even if you’re a seasoned mailler, you might find something that makes your next project just a bit easier. Happy weaving!

How to Open Jump Rings
Learn how to properly open jump rings using chainmaille jewelry making pliers. In this video, Rebeca Mojica demonstrates how how to hold pliers and use them to open jump rings without damaging them.

How to Close Jump Rings
Learn how to close jump rings so there is no gap and the ring stays perfectly flat. In this video, Rebeca gives some tips and techniques for closing jump rings.

How to Use a Bead Mat / How to Scoop Jump Rings
In this video, Rebeca demonstrates how to scoop jump rings from a bead mat when making chainmaille. Using this scooping technique with a bead mat can help prevent jump rings from falling – and help you weave more quickly.

A few of our favorite things: April 2014

If you follow us closely on our page on Facebook or via Twitter, then you know that we recently launched our brand new YouTube channel (yes, we had an old one but it wouldn’t play nicely with our Google+ page so you’ll need to resubscribe to this new channel.)  We’ve been busy adding videos of chainmaille techniques, jewelry projects and more.  You can expect to see new videos each week so make sure to visit often!

About once a month we’ll post our “Favorite Things” video that features some of our new tools, projects and supplies. This month, our Social Media & Marketing Assistant Betsy shows off our new Bead Smith 1-Step Looping tool, our recently launched B3 Steel Collection (which includes a new stainless steel lobster claw) and a new project from B3 team member April that has a free PDF download right here on our website.

Try out one of these new products or projects?  Let us know what you think in the comments section of the video or right here on our blog.

Happy Weaving!

Free Instructions Now Included in Maillers’ Choice Kits!

The headline sums it up, but let us explain.

subscribe-MC

You might be asking, “Well, why are they free now? Maillers’ Choice has been around for a while.” We reached out to our Maillers’ Choice subscribers for their feedback on a variety of aspects of the program. A fair amount of folks expressed that it was frustrating that they had to buy the instructions separately. We can totally relate to wanting to just sit down and get started with a project right away and agreed something about this needed to change.

KIT-ZEELA-ALUM-300px

Zeela – April’s Mailler’s Choice kit!

Originally, we didn’t include the instructions in Maillers’ Choice kits because, at the time, most subscribers already owned them (or at least a variation of the weave) for a majority of the kits. (Our kits and instructions are always sold separately to allow the greatest flexibility for our customers who might already have the rings on hand for a new project, or who want to buy multiple kits without paying for instructions over and over.) When we initially launched Maillers’ Choice, we created it with a similar thought process in mind. Basically, we didn’t want to force folks to pay for something twice! But, time has passed, and subscribers are now letting us know that they, in fact, often don’t already own the instructions for kits they receive each month. Or, other folks wanted to give a gift subscription but didn’t want the recipient to have to buy the instructions each month.

Based on all this feedback, we made the decision to include instructions—at no additional cost—to every Maillers’ Choice kit* beginning with March 2014. To those of you who are Maillers’ Choice members, you have made an investment in B3. THANK YOU! We truly appreciate your commitment to supporting us as a company. We hope you (and future Maillers’ Choice subscribers) enjoy this added value to the program!

*This perk is for Maillers’ Choice subscription members ONLY; if you purchase a Maillers’ Choice kit a la carte, you will need to buy the instructions separately.)