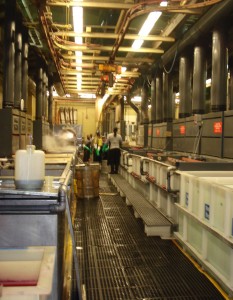
Visit to an aluminum anodizing factory (Anodized Aluminum 101)

anodized aluminum factorySeveral months ago, Blue Buddha Inventory Coordinator Jen and myself visited our aluminum anodizer. Because so many of you have expressed interest in finding out more about the anodizing process, we want to share some of the photos from our site visit.

You may know that Blue Buddha has never done aluminum anodizing in-house, nor do we plan to. Why? Well, unlike anodizing titanium and niobium, which can be done purely by electricity, anodizing aluminum is a multi-step process involving lots of icky chemicals and dyes. If we took this on, we’d have to get all sorts of special waste disposal permits from the city. In short, it is a whole other business model that I do not want to get involved with! I’ll leave that to the experts. Our anodizer is very conscientious about waste and hazardous materials disposals. Innovators in their industry, they’ve found ways to turn waste products into useable materials for other industries, and they’ve received much recognition for their environmental efforts.
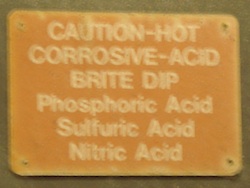
acid warningsHere are some highlights of the anodizing process. There are several steps that we’ve omitted — let’s face it, photos of dipping rings in acid solutions and rinse water (which happens a few times throughout the process) get old quickly. :-) So, here are some of the more interesting parts of the process.

Early in the process, our jump rings are put into a tiny basket and compressed. They need to be very densely packed in order to allow the flow of electricity to pass through all the jump rings. This flow of electricity–the anodizing process–makes the surface of the jump rings porous (you’ll find out more about this in an upcoming post). After the rings have been anodized, they are transferred to a larger basket in order to add the color.
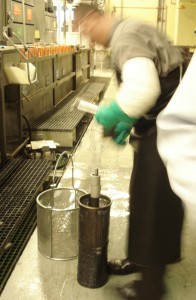
anodizing basket

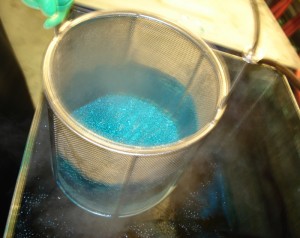
The rings are now brought over to whatever color bath is appropriate. In this case, turquoise rings are being made. The rings are dipped quickly into the bath, and then pulled out. Note the steam in the second photo — the dye is HOT!
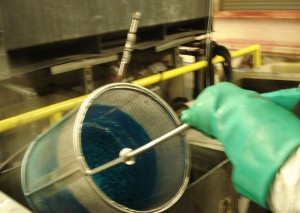
pulling turquoise color out
steaming hot anodized jump rings

The amount of time the rings need to stay in the dye is astounding – a mere 5-20 seconds gets the job done for most colors. In fact, the process is so sensitive that leaving the rings in an extra second or two will cause them to be a shade or two darker than they should be. (Hence our first post in this series: Color variation is just a fact of life.) Here, the anodizer compares the color of the rings against our “target color” sample board to see if the rings need to stay in the dye for another second.
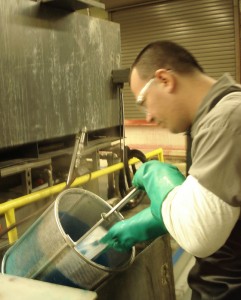
anodizing turquoise jump rings

After the rings are finished being dyed, the color is sealed in, effectively closing the pores on the surface of the metal. (See the next article in our series for more about the porous surface.) There are sometimes a few rings that have not taken the color properly. Sometimes more than a few rings—as many as 30-40%. This means they didn’t receive electricity during the first part of the process. Our anodizer is working on adapting their color-monitoring machine for our jump rings. This means that as the rings pass through the machine, if they do not meet the target color within a certain tolerance, the machine will flick them off the assembly line. Quality control of the 21st century!
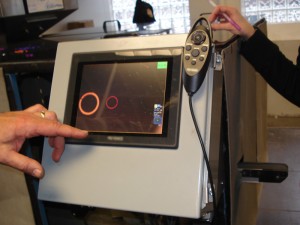
machine quality control for color

When it’s all said and done, the rings await being packed and shipped to our shop.
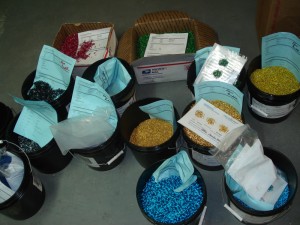
colored jump rings

And finally, this is the image that made me laugh the most. Here at B3, we have jump rings all over our floors. (I know, you’d never believe it, but it’s true! *cough*) And apparently, at the anodizing factory, they have drips on their floor. :-) What can I say, it’s the little things in life that make me smile.
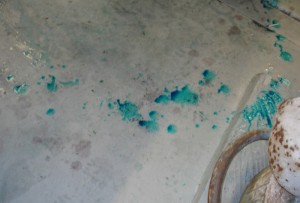
drips of anodized dye on floor

Color variation is just a fact of life (Anodized Aluminum 101)

Welcome to the first article in a series of three that we’re calling “Anodized Aluminum 101“.  Ever wonder what causes color variation?  Want to know what the anodizing process looks like?  Not sure why there are no white anodized aluminum rings?  Stay tuned to find answers to all these questions…and more.


==========================================================================

We make it our priority to give you the most consistent products we possibly can.  We do this because as artists ourselves, we know it’s important.  You have a vision and you need certain materials to make it into a reality.  We not only get it – we’re obsessed with it.

In the beginning of 2010, we started on a journey to create our own anodized aluminum rings and we set out on that journey with our persnickety ways in tow.  Everything worth doing is worth doing right and to us, right means bright, even, shiny color and as much consistency within each batch (and from batch to batch) as possible.  While we take the time to quality control every batch of rings before we package and sell them to customers, we certainly don’t want the process to be too time-consuming to be cost effective or to produce too much waste.  Basically, consistency is key.

We are now making 100% of our own anodized aluminum rings and still looking for ways to improve them.  The fact is however, that color variation (to some extent) will just be a fact of life.

There will always be some level of variation within each batch and variation is even more likely from batch to batch (and from size to size) as they are all dyed separately.  To make these variations play nicely in our world of perfection, we quality control our anodized aluminum rings – ditching broken or malformed rings altogether, and demoting off-colored rings to our sale packs.  In the few cases where there is still a great deal of variation (which happens most often in rings with a small surface area such as our D20 and F20 rings), we toss in an extra 10-20% to give you more rings to choose from if super-consistency is important to your project.  We are also happy to answer questions about the color of our current batches before you purchase them.  In the rare event that we have a color that is very different from our normal stock, we indicate that on our website with a note and/or by changing the name of the color altogether.  We do what we would want someone to do for us – give us the best product they can and communicate when it’s vastly different from what we’ve gotten used to.

Throughout this journey, we have learned a number of things not least of which is that anodizing is a fickle process.  (A fickle process associated with chainmaille?  Never. *wink*)  Fickle process or not, however, we are committed to producing the most consistent product we can (what can we say – we like a challenge!)  To read more about this quest for consistency and to learn more about the anodizing process, check out the next article in this series coming tomorrow – Visit to an aluminum anodizing factory.


Ask an Artist: What is it like to be a B3 Designer?

We introduced our new “By Artists for Artists” at The Bead&Button Show this past year and have since received a number of applications from interested artists.  As we get closer to being able to fully launch the program and begin working with these artists, we want to share the experiences of one of our established B3 Designers, Kat Wisniewski, regarding creating products for Blue Buddha.


============================================================================

When did you start designing for B3?  2008. Glass Caterpillar Bracelet

In your opinion, what makes B3 tutorials distinctly “B3”?  The fact that there is a photo for each and every step, which showcases how to hold the weave, where the pliers are and the path the ring should go through.

What is the hardest thing about writing instructions?  The text must very accurately describe what is going on in each photo.  The photo editing can take a lot of time and adding in arrows that make sense is tricky for sure.  

You photograph many of your own tutorials, what’s one thing you’ve learned about that that you could share?  It’s great to have an extra pair of hands, just to take the photos.  I also use the tool called “Helping Hand” with fishing line to help hold a weave in a certain position while I shoot the photo.  Great lighting and a camera with aperture and F-stop settings is a necessity!  Some metals and colors have to have light adjustments made and a great camera will help do this for you–without actually changing the lighting.


How do you come up with new projects?  I spend hours thinking about and testing what weaves I know, seeing how I can alter them to make them very different.  Other times I try a brand new weave that already exists and then see how I can alter it to be very different.  Many times think about shapes and figures that I enjoy and see how I can adapt those shapes into jewelry designs.

What have you learned from being a B3 designer?  To set myself apart from other designers, I decided to specialize in chainmaille with glass rings.  I’ve learned tons about photoshop editing, photographing jewelry, and writing clear and concise text.

Do you sell the projects/instructions you created for B3 on your own?  Yes, after the exclusivity period, I have sold the instructions on my own through my shop on Etsy.  I sell anywhere from 2-5 per week and notice that there is a great demand for quality chainmaille and wirework tutorials.  I have international customers and domestic customers that have made multiple tutorial purchases from me.


What do you feel it means to be a B3 ambassador?  I feel good about supporting a local craft business that employs other artists and works hard to help customers learn the craft.  I am thankful for the support they have given me to be a designing artist for the company.  Being an ambassador means that I showcase my support for the company to my students and customers in a variety of ways including using them as my primary supplier, being a knowledgeable expert while using reference tools from B3, and producing high-quality and inspiring products for the company.

What characteristics do you think make for a successful B3 designer?

1. You have to be a truly knowledgeable expert, which means it is not just what you know about chainmaille, but that you make a very strong effort to know everything there is to possibly know about chainmaille.  If the advice and technique you share is limited to what is only your experience, you credibility will certainly be challenged and possibly lost when other experts find your errors and lack of expertise.
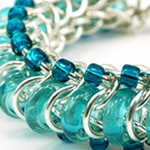
 

2. The ability to design inspiring, revolutionary products.  Also the ability to take a previous idea, pattern, or weave and simplify it so that weavers at all levels can re-manufacture it.


3.  You have to be willing to share! Many people may want to make a design that you have originated and it may appear everywhere in a short period of time (as the Glass Caterpillar did) due to B3’s immense customer base, so you must be OK with knowing that once it is released, it is no longer just yours anymore–it will be available to everyone.


============================================================================

If you’re interested in becoming a B3 Designer, learn more about the program and how to apply here.  To find out more about Kat’s experience, post your questions in the comments section below, write the on our wall on Facebook or Tweet them to us.
Ideas for Storing Your Jump Rings

Any chainmailler can tell you that finding a great storage solution for all your jump rings is a necessity, but keeping all those sizes, colors, and metals organized is no easy feat (not to mention avoiding that dreaded sound of rings hitting the floor or the discovery of the backpack or purse jump ring explosion!) 

We decided to ask our community on Facebook what solutions they have come up with for storing their jump rings and they did not disappoint! Here is a roundup of some of their creative (and somewhat unexpected) suggestions as well as links for where to find them.

=========================================================================

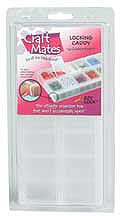
Craft Mates Bead Caddies


We here at Blue Buddha use these almost exclusively for storing small amounts of jump rings set aside and organized for our interns, teachers, and Rebeca herself.  Because they are made for crafters, they do an excellent job of staying closed and keeping things separate – two incredibly important features for chainmaillers.  We especially like their locking feature and the fact that you can open each compartment one at a time (allowing you to dump out just one size at at time.)  There is no need to keep things in baggies in these containers.  We write directly on ours with Sharpie but a label-maker would do the trick to help you remember what is in each compartment (or take a suggestion for one of our fans on Facebook and try re-purposing the labels that come on our baggies by peeling and resticking.)

For a listing of where to find Craft Mates Bead Caddies, visit their website.

=========================================================================

Hardware Organizers: Drawers


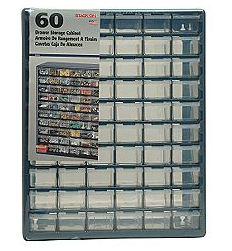
There are a variety of small drawer organizers that are normally used for organizing hardware (such as nuts, bolts, and screws.)  These are not so portable, but offer a lot of storage for home.  If you use something like these drawers (something similar to what we use in the studio for storing ring packs ready to be put into orders) you will probably want to keep your rings in baggies to avoid spillage.

These can be found at a number of places for under $20, here is one we found available on the Sears website.
=========================================================================

Hardware Organizers: Containers


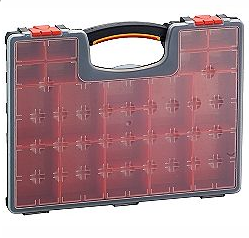
Similar to the Craft Mates caddies, these can be used to store your jump rings for toting around.  Unlike Craft Mates, many of these do not allow you to open up one section at a time, so again you may want to keep your rings in baggies to avoid mixing/spilling when you open the lid.

Also available at any number of stores for $10-$20, here is an one we found on the Sears website as well.
=========================================================================

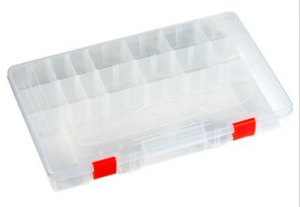
Tackle Boxes


Several folks in our community on Facebook recommended looking in the fishing department of your local sports store.  Tackle boxes come in lots of different sizes, with varying compartment sizes and many let you move the compartment separators around to customize your storage.

Here is one made by Plano (another recommendation from folks on Facebook) available from Bass Pro Shops.

=========================================================================

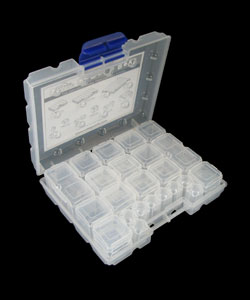
Dot Box Storage System


These come strongly recommended by one of our community members on Facebook.  Lot’s of small containers that close tightly and can be removed and opened individually.  The system offers a variety of container sizes allowing for lots of customization within one case.

Dot Boxes are available from several different sources.  Visit this site see a video to that shows all the smaller containers contained in the larger carrying case. 

=========================================================================

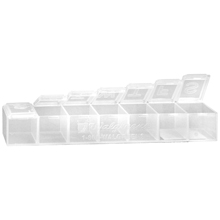
Pill Organizer


This was another suggestion we received when we posed this question to our community on Facebook.  Try using a pill organizer for a current project.  It’s probably too small to store ALL your jump rings, but can keep just enough to tote around with you for working on a certain project on-the-go.

Pill organizers like this one available on the Walgreens website can be found at any local drugstore.

=========================================================================

Even more ideas…

– Empty pill bottles
– Condiment cups with snap on lids
– Spice jars with magnets that stick to a strip on the wall (turn the lid and shake some out – minimizes spillage)
– Plastic containers used for embroidery floss

Have a solution not mentioned here?  Share it with us in the comments below!  Thanks to everyone on Facebook that responded to our question.  You all are a never-ending source for ideas and inspiration and we love it!


Hey B3 fans – Cast your vote!

CAST YOUR VOTE NOW!

Submissions for our first ever Featured Product of the Month Contest are now closed which means it’s time to cast your vote to determine the winner.  Folks this month were challenged to create a piece that featured our size X12 anodized aluminum rings.  The submissions are so inspiring and we’d like to thanks everyone who participated for your excitement and creativity.  Voting will close September 30th at 5pm CT.  Voting is only allowed once per computer so choose wisely!

To share the survey, we recommend you copy the link to this blog post and use that in any emails, blog posts, or social media posts you’d like to make about it (we’ve noticed some weirdness in the past with sharing the link directly – it sometimes like to bump people out of voting that haven’t already.)

===============================================================


Did you miss your chance to participate in this month’s contest?  Don’t worry – there’s always next month!  October’s Featured Product of the Month is our size D20 – 20g 1/8″ (3.2mm).  Check out our D20 weave ideas blog post to get your creative juices flowing!